My DIY photos
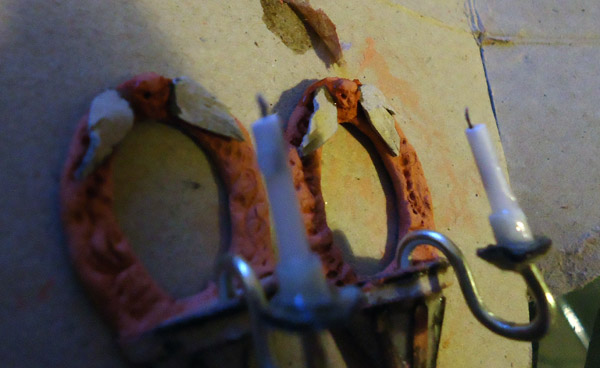
Owl candle mirror things
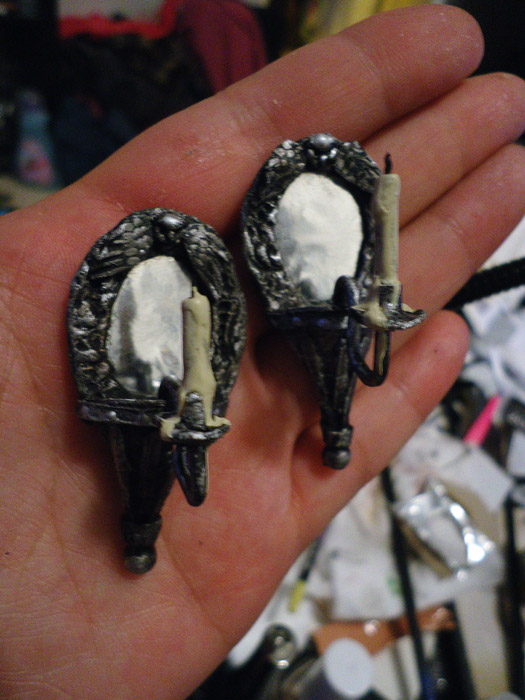
I made these owl candle sconces(is that what they are called?) after this tutorial http://1inchminisbykris.blogspot.fi/2011/06/candle-sconce-tutorial-how-to-make-non.html
I roughly followed the tutorial about measurements and some parts but I made the frames from some hobby dough thing, some super cheap one that you can get from almost any store that dries with air and isn't very good in general, but these decorations are so tiny that I don't think it matters what I press on them :D I made tiny owl faces and made tiny cardboard wings. I think they look pretty cool when they're done. The dripping candle wax is just extra layer of thick hobby paints.
I roughly followed the tutorial about measurements and some parts but I made the frames from some hobby dough thing, some super cheap one that you can get from almost any store that dries with air and isn't very good in general, but these decorations are so tiny that I don't think it matters what I press on them :D I made tiny owl faces and made tiny cardboard wings. I think they look pretty cool when they're done. The dripping candle wax is just extra layer of thick hobby paints.
Matchbox drawer
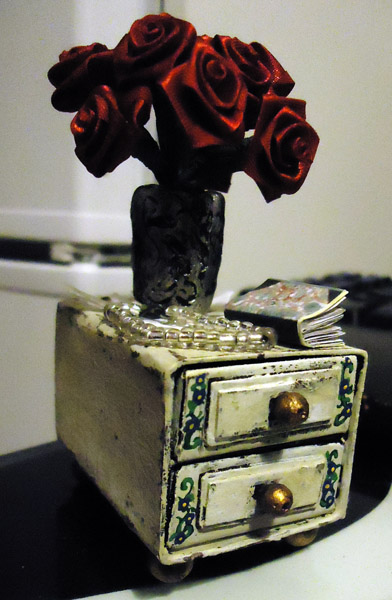
This one has been made from matchboxes.
The beads I used are a bit big and I don't like them that much but they will do :D
Tutorial can be found here http://www.duitang.com/people/mblog/22510423/detail/
or here http://pinterest.com/pin/356065914259589471/
The beads I used are a bit big and I don't like them that much but they will do :D
Tutorial can be found here http://www.duitang.com/people/mblog/22510423/detail/
or here http://pinterest.com/pin/356065914259589471/
Antique carousel horse
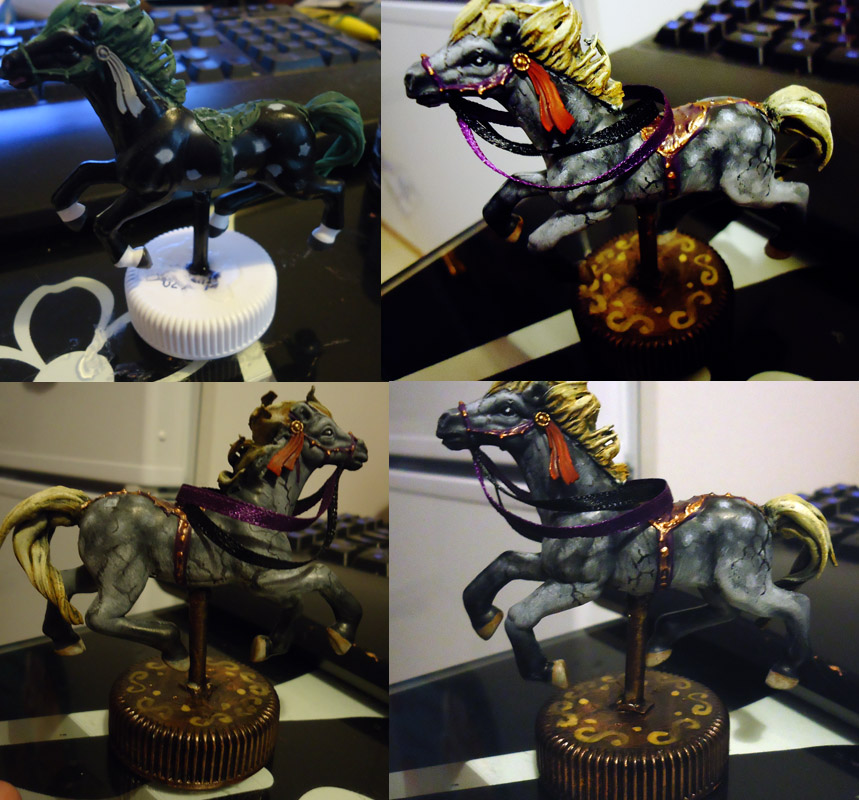
This one is made from a cheap childrens toy. I cut the original mane and tail off because they were non-existant and I like it long and flowy instead but it can be any kind you want really. The green material I used to sculpt the new ones is called green stuff and for example Games Workshop sells it http://www.games-workshop.com/gws/catalog/productDetail.jsp?prodId=prod1380024a
It hardens with air so there's no need to heat up the oven.
The bottom of the horse is a plastic jar lid, can be anything round. The stick is a black thick plastic straw, but could also be anything you want. I used then miniature paints to paint it more realistic looking, because as you can see the original paintjob wasn't very detailed. I added some ribbons for reins and tadah! All done :D I love carousel horseys.
Tiny side table
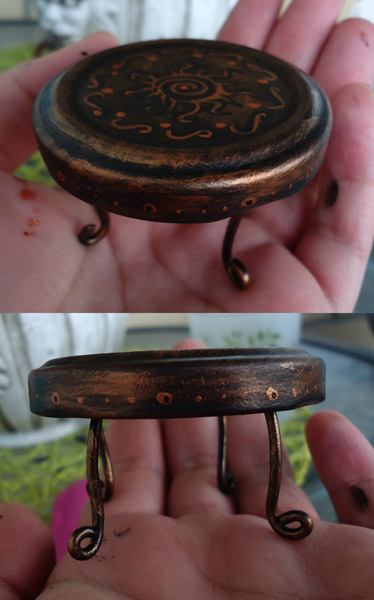
This one is a jar lid with aluminum wire glued as legs. It has been painted after assembly.
Could look like anything you want. Very easy to make :)
Could look like anything you want. Very easy to make :)
Curious crow
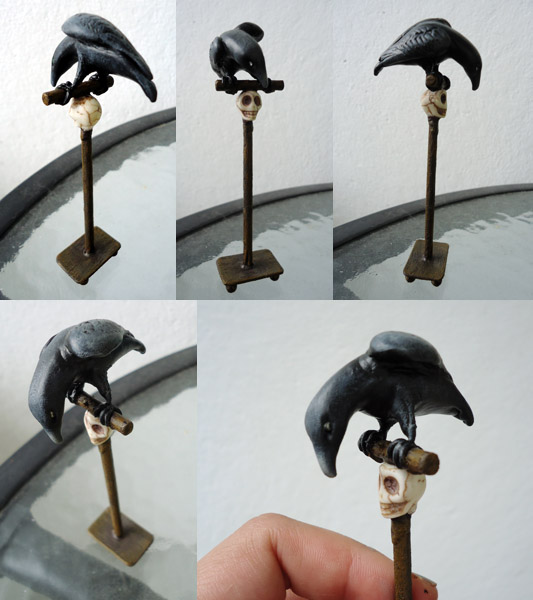
I love crows and ravens. This one was a lot of fun to make. The crow is made from green stuff and the whole thing has been painted with miniature paints. The eyes are glass beads so that they have a wicked shine to them when light hits them
I used BBQ sticks and a skull-bead + glue to make it, crow is attached with wire also because he wouldn't have dried without falling on his beak otherwise.
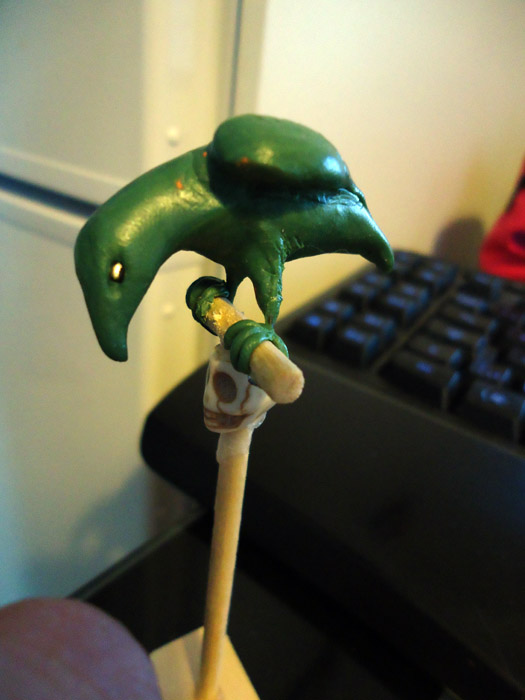
I'll also put a picture before paint job so it's easier to see what it's about.
I used BBQ sticks and a skull-bead + glue to make it, crow is attached with wire also because he wouldn't have dried without falling on his beak otherwise.
I'll also put a picture before paint job so it's easier to see what it's about.
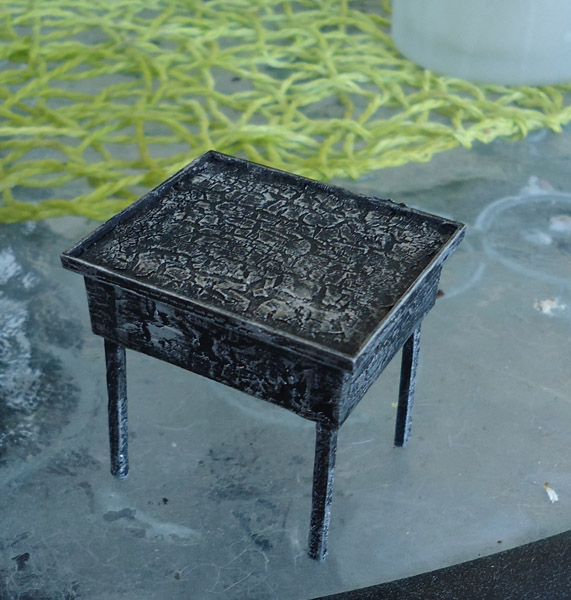
Another mini table
This is the bottom of a plastic jewellery box that you get when you buy earrings for example or something like that, you know those, transparent lid and yeah all that. I glues matches as legs and painted the whole thing with graffitti nail polish that crackles as it dries. Then I painted it all black and then dry-brushed with metallic silver to make the crackling show. Dry-brushing is when you take paint on a brush and brush it elsewhere until it barely gives out paint and then you gently brush over the surface you want to paint so that the paint only sticks a little bit to the highest parts, you don't push the brush or anything, only gentle brushy brushy :)
